


 |
 |
 |
 |
 |
 |
 |
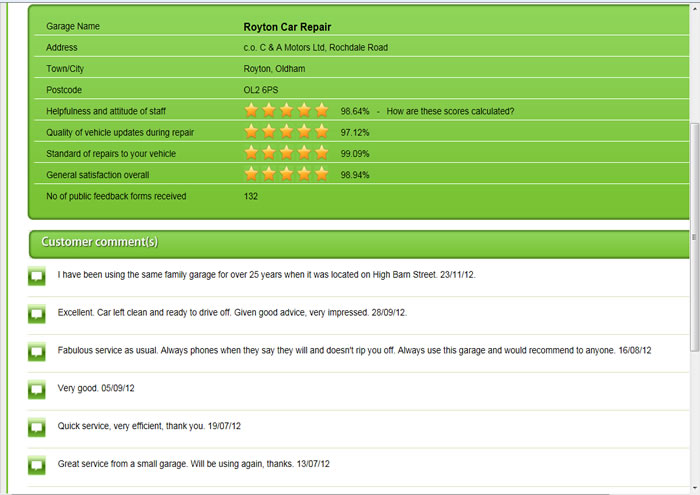
Royton Car Repair
Latest News
Royton Car Repair have now invested in a fully mobile credit card machine to enable customers to pay with their credit cards when the vehicle is delivered back to them, thus eliminating the need for customers to return to the garage to pay their bill.
Most modern vehicles have extended service intervals such as 20,000 miles or 12 months. The key word which we must stress is OR. Please don’t misinterpret this as your car needs servicing every 20,000 miles. A lot of people are falling into this trap with very expensive consequences. Some people, myself included, only cover about 6,000 miles per year, with a small number of these people thinking that it is alright to only have their vehicles serviced once every three years. If anything, it is the opposite, low annual mileage usually means a lot of cold starts and short journeys meaning oil changes are more critical than on a car which covers 20,000 miles in 12 months. Personally I change my oil and oil filter every 6 months, but every car needs at least an oil and filter change with an engine flush every 12 months regardless of mileage.
Royton Car Repair recently joined the Good Garage Scheme, a nationwide accredited scheme promoting the image of garages that adhere to strict guidelines regarding servicing and repairs of vehicles to industry standard levels. This gives you the customer more confidence when choosing a garage for the first time. The Good Garage Scheme also acts as arbitrators in the event a customer is unhappy with the service they receive. Every Good Garage Scheme service includes a check sheet (detailing all work carried out) within a service booklet containing a pre-paid customer feedback card allowing customers to rate the level of service they have received. All feedback is then recorded by the Good Garage Scheme and posted on the garages page within the Good Garage Scheme website. To view Royton Car Repair’s Good Garage Scheme page including feedback click here.
Citroen C5 2.0 HDi 2005
The above car came in for an engine service, the customer refused an engine flush saying his car had been regularly serviced in the past. After running the car until it was up to temperature we then switched it off and started to drain the oil. Approximately 2 litres of liquid tar came out of the sump plug. The sump should hold about 5 litres of oil. We checked the dipstick reading when drained which mysteriously still said the oil was at the maximum mark. The customer was contacted and told that further investigation was needed. We removed the sump to find it had what can only be described as thick sludge filling half the sump and the dipstick tube which was why the reading on the dipstick still said oil level ok. The sludge was scraped out and the oil pick up strainer cleaned and everything built up again. After re-filling the engine with fresh oil and a flush, a new oil filter was fitted and we started again running the car up to temperature and allowing the flush to do its job. In this case the customer was lucky no further damage was done, the oil was drained again and another new oil filter fitted and the engine re-filled with fresh oil. We advised the customer to return in 6 months for another oil and filter change and a flush to try to remove the last of the harmful deposits. Yet another case of low annual mileage and skipping a service to save money.
Peugeot 607 2.2 HDi 2005
The above car was towed into us recently with the customer complaining of a knocking noise and low power. The lack of power was quickly resolved when an intercooler pipe was removed and the turbo vanes inspected. The turbo had failed due to oil starvation. The dipstick and the dash information both said the oil level was okay but after previous experience we drained the oil and measured the quantity drained. One and a half litres came out of the drain and so we proceeded to remove the sump. Again it was nearly half full of sludge but the knocking noise was still a concern so further investigation was needed. We removed the balance shafts from the bottom of the crankshaft along with the oil pump and drive chain so we could inspect the crankshaft, big end bearings and main bearings. After removing number one big end bearing cap it became obvious what the knocking noise was. Due to oil starvation the big end bearing shells had spun on the crankshaft causing damage to the con rod and the crankshaft. The gearbox and torque converter were removed along with the subframe and associated suspension parts to enable the removal of the crankshaft which had to be sent away for re-grinding. The cylinder head was then removed to allow removal of the damaged con rod and piston. A new con rod, big end bearings and main bearings were all fitted along with a new turbo, cylinder head gasket set and new bolts. The whole thing was built up and the process of flushing all the oil journals began to remove the harmful deposits left in the engine. The final bill came to just short of £3000 all of which was completely avoidable with regular oil and filter changes with a flush. The money the customer had saved on not having his car serviced amounted to a maximum of £300, was it really worth it in the long run?
Turbo Or Not Turbo? That Is The Question!
Vauxhall Vectra 1.9 CDTi 2007 150 BHP
The above car came in recently making a whistling noise on acceleration, several other garages and a local turbo repairer had all diagnosed the fault as the turbo with prices averaging around the £1000 mark supplied and fitted. At first we thought it was the boost valve solenoid after blocking one of the pipes from the solenoid the noise went away but the car had reduced power. Finally thinking it was the turbo too, we set about removing it to check for play in the vane spindle bearings. The turbo unit is part of the exhaust manifold on these models, so the exhaust downpipe and heat shields were removed to try to gain access to it. Finally after removing the ancillaries, the oil feed pipe, the oil drain pipe and supporting bracket, the manifold was ready to be removed. It was then that we noticed some black soot around number four exhaust port and when we put the socket on to undo this nut it sheared off with little or no effort. Once the turbo was removed, placed on the bench and checked, it was found to be okay. We removed the broken stud cleaned up both surfaces, replaced the stud along with a new manifold gasket and built up the rest of the components, crossed our fingers and started the car. The noise was gone, so it was all down to exhaust gases escaping from around this broken stud. The customer was over the moon because it had cost a fraction of what he had expected.
Vauxhall Corsa 1.3 CDTi 2006
The customer came in complaining of bad starting and an unpredictable loss of power such as sudden loss of power when pulling out of junctions and onto roundabouts, obviously not a pleasant experience! After preliminary inspection to make sure all connections, hoses, vac pipes etc were all present and serviceable we carried out a diagnostic check to see if any fault codes were stored. The ECU reported a fault with the air flow meter, using data we had on the readings the air flow meter should be showing we determined that there was a fault between mid and full throttle. Replacing the air flow meter made no difference at all even though all the readings we had indicated that it was faulty. We then started checking other known faults on this engine such as turbo waste gate linkage seized, EGR faulty, MAP sensor faulty, all to no avail. We then removed the EGR valve to see if it was blocked, it was surprisingly clean. We removed the MAP sensor which we found to be heavily contaminated, after cleaning this we then started to investigate the inlet manifold via the MAP sensor and EGR sensor apertures, here we found the cause of the problem. Yes the MAP sensor was blocked and a quick clean could have solved the problem short term but the main cause was a heavily contaminated inlet manifold which we removed and spent a good hour cleaning. The inlet ports on the cylinder head were also heavily contaminated and needed cleaning. After rebuilding everything and test driving and a couple of cold start tests the car was returned to one very happy customer who now had the confidence to pull out on roundabouts again.
Landrover Freelander Clutch Problems
Landrover Freelander 1.8 2001
The above vehicle came in with the customer complaining of difficulty selecting gears, more noticeable in first and reverse. After an initial test drive it became obvious that the clutch wasn't clearing properly. Our first thoughts were a problem with the clutch hydraulic system possibly a leaking master cylinder or slave cylinder but after careful examination it was found that neither of these showed any signs of leakage. After doing some research we found that early models of this vehicle had had a recall for a clutch pedal fault but after checking the chassis number against affected model we found that this particular vehicle had already been modified. It was only when someone else was operating the clutch and the slave cylinder was being inspected that the fault became apparent. The slave cylinder was flexing backwards as the clutch was depressed not allowing the clutch fork its full travel. After carefully removing the slave cylinder and the mounting bracket we found the mounting bracket cracked in three places. Ten minutes spent with the welder and the bracket was repaired and reinforced. The customer went away relieved after initial quotes from another garage had been in the region of £400 for a new clutch!
Transit Connect Charging Problems
Ford Transit Connect 1.8 TDDI 2006
The above vehicle was towed into us with a reported fault of the battery light on when running. After jump starting the vehicle we used a multimeter to check the charge rate which should have been reading anywhere from 13 - 14.5 volts at the battery but was only reading 11.2 volts. Suspecting the alternator to be at fault we sent it away for testing as opposed to just replacing it, just to make sure. The test results came back as no fault found with the alternator, so we started to investigate the wiring. After removing all the insulation from the wiring loom running up the fan cowling we traced the problem to a corroded and broken wire. Luckily the local Ford dealer sells this short length of harness as it is a known fault with the Transit Connects. Fifteen pounds and half an hour later it was back on the road after the customer had been quoted £140 for a replacement alternator elsewhere which obviously wouldn't have cured the problem.
Is Your Car Still Under The Manufacturer’s Warranty?
Are you returning your car to the dealers for servicing? If so, why???
If your car, in most cases, is under three years old it will still be under warranty with the manufacturer. Hyundai warranty is five years and Vauxhall have now brought out a ten year warranty. But did you know that main agents try to insist that the car has to return to them for servicing to maintain the warranty. Under legislation passed by the EU it is now possible for independent garages such as ourselves to service your car at a fraction of the cost of main agents so long as we follow the service schedule set out by the manufacturer and use genuine parts. So don’t let the main agents bully you into returning your car for servicing when they are charging on average £80 per hour for the privilege! If in doubt ask your dealer if it will invalidate your warranty having your car serviced at an independent garage of your choice, if the reply is yes, then they are blatantly breaking EU law. For more information see article here.
Royton Car Repair have now invested in a courtesy car so customers can still be mobile whilst their car is in for repair or servicing. Pre-booking is essential as we cannot guarantee availability at short notice although we will always try our best to help. Customers wishing to use the courtesy car service must bring their driving license and fully comprehensive insurance certificate with them when leaving their vehicle for repair.
When do I need to change my Timing Belt / Cambelt?
Timing belts or cambelts as they are also known should be replaced at intervals determined by the vehicle manufacturer. Each vehicle and engine type has a different replacement interval guide dependant on mileage and age of the vehicle ranging from 40,000 miles or 4 years up to 150,000 miles or 10 years (whichever occurs soonest). For an in depth explanation of what the timing belt is and does click here. Timing belt failure or any of the guide pulleys or tensioner pulleys failing can result in catastrophic engine failure which is why it is vitally important to follow the manufacturer’s recommendations for replacement. If you have recently bought a second hand car the previous service history should be checked and confirmed where possible to determine if the cambelt has been changed at the correct time or mileage. If you are in any doubt or are unable to confirm when the cambelt was last changed, then the safest way is to have it replaced. At Royton Car Repair we always fit a cambelt kit instead of just a belt, which comes with new belt, guide pulleys and new tensioner. If you are uncertain as to the mileage or age your car requires the cambelt to be replaced or if you require a quote for replacement, please give us a call and we will be happy to help.
Renault Clio 2.0 Sport 2002
The above vehicle had been in recently for new brake discs and pads all round, the customer rang me two days later to say that she had approached a roundabout the previous night and braked as normal but the car had juddered, taken longer to stop and the ABS light had come on, she was concerned as this had never happened before the brakes were changed. After confirming that this had been an isolated occurrence and the ABS light had not reappeared, I assured her she had probably skidded slightly on a patch of diesel but to let me know if anything out of the ordinary happened again. Two weeks later I received a call from a very distressed lady saying the car had done it again that morning coming down a hill and she had been unable to stop for the junction, luckily she was fine just a bit shaken. I went and picked the car up and sure enough at low speed I felt the ABS kick in when it shouldn't have, gingerly driving back to the garage I was convinced I would find a broken ABS ring on one of the front driveshaft’s as this is quite common, but once the car was on the ramp it was obvious there was nothing wrong with them, the rears were new with the discs so they should be okay but I checked them anyway. There are two sizes of ABS ring on the Clio's, 27 teeth or 44 teeth, I had counted the teeth on the old discs and had ordered the 44 teeth as required but seeing as the problem had only occurred since the work had been done I double checked and counted the teeth on the new rear discs and got 48!!! Scratching my head I rung the supplier who confirmed he had supplied the 44 tooth discs and they didn't make a 48 tooth ABS ring for a Clio. Admitting maths wasn't my best subject at school but confirming I could count to 48 he rung the manufacturer to be told that a faulty batch had got through quality control and there was indeed some discs out there with a 48 tooth ABS ring fitted but emails had been sent to all purchasers asking them to check stock and return any faulty ones for replacement. Unfortunately my supplier hadn't seen the email. So if anybody else is experiencing intermittent strange faults after fitting new rear discs to a Clio just double check the number of teeth on your new discs ABS ring. Luckily this time there was no damage caused and after an apology from my supplier to the customer everybody was happy.
Ford Focus ST 2007
Customer reported that the car had gone into limp home mode on the way home from work the previous night with an engine fault message on the dash and had failed to start the next morning. I got to the car and it started straight away but said engine fault and 0 miles to go to empty. After carrying out a diagnostic check the codes P0230-fuel pump primary circuit malfunction, P2127-throttle/pedal position sensor below minimum threshold, were stored, along with the 0 miles to empty I thought we were dealing with a simple case of fuel level too low. Put 20 quid of fuel in it cleared the codes and test drove, everything seemed okay and no codes. Customer had the car for a week and reported the same problem again. The only code this time was the P2127- throttle/pedal position sensor below minimum threshold. Looking at the live data the car was reading partial throttle when the throttle was closed and wasn’t reading wide open throttle when it was fully open, the only other thing I had noticed as strange was the miles to go on the dash seemed quite erratic with its accuracy. Everything was pointing to a problem with the pedal or the throttle body, but something was niggling me about the non start for the customer and the erratic reading on the dash. After checking the charge rate and happy with the 14.2v I did a drop test on the battery which recorded ok but not great, I then connected the voltmeter across the battery to see what happened on cranking, the voltage dropped to 7.4v on cranking. I replaced the battery with a good Yuasa model, cleared the codes and test drove, returned the car to the customer and it would appear the problem is solved. The moral of the story is even if the codes and the live data are pointing you in a certain direction, make sure the basics are good before replacing unnecessary parts.
Renault Scenic 1.6 petrol 2005
The customer complained of a check injection warning on the dash and the engine racing, apparently it was ticking over at 2000rpm, the customer had turned the car off, restarted and the revs were back to normal but the check injection message was still showing. The customer was a regular and had several repairs within the last six months including a clutch, a window regulator and an alternator. A diagnostic check revealed no codes, several test drives revealed nothing on the live data apart from within a few minutes of start-up the revs would increase to about 1500rpm and would not decrease until reset by switching off. A visual inspection and a wire wiggle test revealed nothing, after the previous experience with the Focus I thought I would start with the basics again. The battery was okay on rest and under load, the charge rate was fractionally higher than expected at 14.5v (14.2v – 14.3v is normal) but the alternator is only 3 months old so nothing to worry about really or so I thought. I decided to call a mate who specialises in Renaults, after explaining what little I had found and a brief history of the vehicle he asked me to go into the live data again and look at the alternator load readings to which I couldn’t because my equipment didn’t give me that information. The next day he came down after work and connected his Renault Clip software. Watching the readings for the alternator load they went from around 35% for the first couple of minutes to 98% and the engine started racing again. He said he had seen it a couple of times before, when an aftermarket alternator had been fitted the UCH unit was receiving the wrong frequency signal from the alternator. This resulted in the UCH thinking there was a high demand for electrical load in the vehicle that the alternator wasn’t able to meet so it raised the rpm of the vehicle to increase the speed of the alternator to generate more power to meet the perceived need. After fitting a genuine Renault alternator the UCH was happy and the revs stayed where they should be, you’ve got to love Renaults and their electrics!
Vauxhall Zafira 1.9CDTi 2008 Z19DTH
The customer came in complaining of severe lack of power. We carried out a diagnostic check to find code P0243 – Boost Control Valve Open Circuit. We connected a multimeter set to resistance across the boost pressure sensor terminals to find we had a reading so no open circuit there. Connected across the wiring plug to find no reading indicating a possible break in the wiring. On the Zafira the boost pressure sensor is on the offside, right at the front, underneath the chassis leg. We removed the airbox to get a better view of the wiring and follow it up to the top of he engine. It is clipped to the chassis just underneath an air conditioning pipe before it goes across to the engine to run up the side of the cambelt cover which it should be clipped to, on this one it was out of its clip. The corrugated sheathing was worn underneath the pipe with the red/white and green/white wires visible. At first glance the wires were intact, but on closer inspection there was a dot of green on the red wire. When pulled either side of the dot the wire just fell apart. Water condensation from the air conditioning pipe had got in through the minute hole and over time had corroded the copper wire until it no longer made a circuit. After soldering and heat shrinking a new piece of wire into the loom the scanner was plugged in and the code had cleared itself. A very short test drive was all it took to determine we had all 150 horses back again!
Nissan X-Trail 2.0DCi
The customer complained of no power and engine management light on. We performed a diagnostic check to find code P0235 turbocharger boost sensor A circuit malfunction. The boost sensor is located at the front of the engine with three wires going to it. Brown which should be +5volts, Orange which is –ve ground and Cyan which is the signal wire which should read around +1volt on tickover. When measured this was reading +0.85volt and didn’t change as the revs increased. A new original equipment Bosch sensor was ordered (part number 0281002740) and fitted. Checking the Cyan wire again it was now reading +1.1volts on tickover and increased accordingly with the revs. Problem solved.
Engine Management Light on and No Power
Ford Mondeo 2.0L Diesel 2010
After performing a diagnostic check, codes P246B – “Vehicle conditions incorrect for diesel particulate filter regeneration” and P2463 – “Diesel particulate filter soot accumulation” were stored, these were hard codes that could not be cleared. Viewing live data showed the soot content of the DPF to be at 220%. We used the Forté Power Clean diesel particulate filter cleaner and flush as per instructions and the soot content came down to 14%. The 2 fault codes could be cleared and we set off on an extended test run to clear the system out. Within 2 miles the engine management light came back on with a new code P269F – “Exhaust after treatment glow plug circuit open”. It looked like we had found the culprit for the soot content so high and the DPF unable to regenerate. A new fuel vaporizer was supplied and fitted and an extended test run carried out. The soot content came down further to 9% and no more fault codes were present.
Engine Management, Traction Control Light on and No Power
Hyundai I30 1.4L Petrol 2013
After confirming the fault and performing a full diagnostic check, codes P2138 - Throttle / pedal position sensor “D” / “E” voltage correlation, P0326 – Knock / combustion vibration sensor1 circuit range / performance bank 1 or single sensor, and C1613 CAN transmission not matched were present. Going into the freeze frame data revealed that all the codes had happened simultaneously with the engine cold, vehicle stationary and the engine RPM at 163 but showing a battery voltage of 10.70. It didn’t make sense because on cranking the rpm should be about 300 unless the battery voltage was low but 10.70 was a good cranking voltage. Having no overall wiring diagram available we checked all the fuses first to see if there was one common fuse to all three faults, no joy there. Next we checked the most obvious the throttle pedal position sensor for power and ground supply. Pin 2 should have read 5v but instead read 3.2v. It got its feed directly from Pin A19 on the engine ECU so now we needed to test the voltage directly at the ECU. Upon removal of the ECU multi plug the cause of the faults became obvious, there was evidence of water ingress into the plug and ECU. Looking at the state of the corrosion I wasn’t hopeful the ECU could be saved but I set about cleaning it with copious amounts of electrical contact cleaner and a very soft brush. After refitting and clearing codes it was time to try it, the lights all went out and it revved cleanly. Time to investigate how the water got in there. The ECU is mounted behind the battery directly under the lip of the scuttle panel, but after pouring water in and around the area the drains seemed to be all free flowing. The only explanation we could come up with was, over the weekend we had had rain of biblical proportions with several local areas being flooded, maybe the drains had been partially blocked resulting in overflowing onto the ECU until the sheer amount of water and pressure had removed the blockage? Not conclusive but the only explanation we could offer. After an extended test drive and another full diagnostic check with no codes present the car was handed back to a very happy customer.
ECU Before Cleaning
ECU After Cleaning
Plug Before Cleaning
Plug After Cleaning
Nissan Juke 1.6L Petrol 2010
Carried out a diagnostic check to reveal code B1035 – Crash Zone Sensor (Communication Fail). After looking at a diagram of the crash sensor locations it was obvious that the most likely culprit was going to be the front one located in the centre on the front pane behind the grille. This was most likely because it is the most exposed sensor and with it being a communication fail fault was most likely an open circuit. Upon initial inspection everything seemed fine until we gave each wire a gentle tug. The white wire pulled straight out of the weather seal on the plug. Water had got past the weather seal and corroded the wire right at the terminal. The easiest way to repair this was to get another plug from a scrap yard with a short length of wire still attached and join the wires using solder and coated heatshrink to seal the joint. After refitting the sensor and clearing the codes the airbag light went out. Another one fixed.
Broken Wire

